
A fresh coat of paint can completely change a room. However, nothing ruins a paint job faster than messy, uneven edges. That is where painter’s tape comes in. When used correctly, it gives you the clean, sharp lines that make a room look professionally done.
Many homeowners rush through the taping process. They slap on a roll of tape and hope for the best. Unfortunately, that approach often leads to paint bleeding underneath, uneven lines, and a frustrating do-over. The good news is that using painter’s tape like a pro is not complicated. It just takes the right technique, a little patience, and a few key steps.
This article walks you through everything you need to know. From choosing the right tape to removing it without damaging your walls, you will find clear and practical advice here.
Choosing the Right Painter’s Tape
Not all painter’s tape is the same. The type you choose can make a big difference in your results.
Standard blue painter’s tape works well for most indoor projects. It sticks firmly but removes cleanly without pulling off paint underneath. For delicate surfaces like freshly painted walls or wallpaper, use a low-adhesion tape. These are usually labeled “delicate surface” or “safe release.”
For outdoor projects or areas with high humidity, such as bathrooms or kitchens, look for a tape designed for those conditions. Outdoor tape holds up better against moisture and temperature changes.
Additionally, consider the width of the tape. A wider tape offers more coverage and protection. A narrower tape is easier to control in tight spaces. Most DIYers find a one-inch or two-inch tape works well for general painting tasks.
Preparing the Surface Before Taping
Surface preparation is one of the most important steps in any masking technique. Even the best tape will fail on a dirty or uneven surface.
Start by cleaning the wall with a slightly damp cloth. Remove dust, grease, and any loose paint. Let the surface dry completely before applying tape. Applying tape to a damp surface is one of the most common mistakes people make.
If the wall has previously been painted, make sure that paint is fully cured. Fresh paint can peel away with the tape if you apply it too soon. Most latex paints need at least 24 hours to dry and up to 30 days to fully cure. Therefore, wait as long as possible before taping over a recently painted surface.
Also, check for any cracks or uneven textures along the area where you plan to tape. Paint can seep through gaps between the tape and a rough surface. If needed, lightly sand the edge or use a tape with better conformability for textured walls.
How to Apply Painter’s Tape Correctly
Applying tape is simple, but doing it well takes a steady hand and attention to detail.
Start at a corner or a fixed point, such as the ceiling or baseboard. Press the tape down firmly as you go, working slowly along the edge. Do not stretch the tape as you apply it. Stretching causes it to warp and creates gaps where paint can bleed through.
Use your fingernail or a putty knife to press the edge of the tape firmly against the surface. This step is critical. The inner edge of the tape, the one closest to where you will paint, must be completely sealed. Even a small gap can let paint seep underneath.
For long, straight lines, try using a tape applicator tool. This device holds the roll and lets you apply it with consistent pressure. It is especially helpful for baseboards and ceiling lines.
When taping corners, overlap two pieces of tape and cut them cleanly with a utility knife or scissors. Do not fold or bunch the tape at corners. A clean, precise corner gives you a much sharper finished line.
Masking Techniques for Different Surfaces
Different surfaces call for different approaches. Knowing a few solid masking techniques can save you a lot of time and frustration.
For smooth drywall, standard painter’s tape works beautifully. However, for textured walls, you need to take extra care. Press the tape down firmly along the entire edge. Some painters use a thin bead of paintable caulk along the tape edge for extra protection. Once the caulk dries, you paint over the sealed edge. This eliminates any chance of bleed-through on rough textures.
On trim and woodwork, take your time. Apply tape in short sections rather than one long piece. Short sections are easier to align precisely. Press each section firmly before moving on to the next.
For glass surfaces, such as window panes, painter’s tape is ideal. Apply it flush against the frame edge. When you are done painting, remove the tape before the paint dries completely. This gives you the cleanest edge on glass.
Floors and carpets also need protection. Use drop cloths alongside your tape. For hard floors, low-tack tape prevents scratching and adhesive residue. For carpet, press the tape firmly under the baseboard edge so paint cannot drip onto the fibers.
Painting Over the Tape
Once your tape is firmly in place, you are ready to paint. However, there is a smart technique most beginners overlook.
Before applying your main color, paint a thin layer of the wall’s existing color along the tape edge. Let it dry. This seals any micro-gaps in the tape. When you apply your new color on top, the seal prevents bleed-through. This single step is used by professional painters to get razor-sharp lines every time.
Apply your main paint color using smooth, even strokes. Always paint away from the tape edge, not toward it. Pulling your brush or roller away from the tape reduces the chance of pushing paint underneath.
Do not overload your brush or roller. Excess paint increases the risk of drips and bleeds. Use thin, controlled coats. Two thin coats always look better than one thick coat.
When and How to Remove the Tape
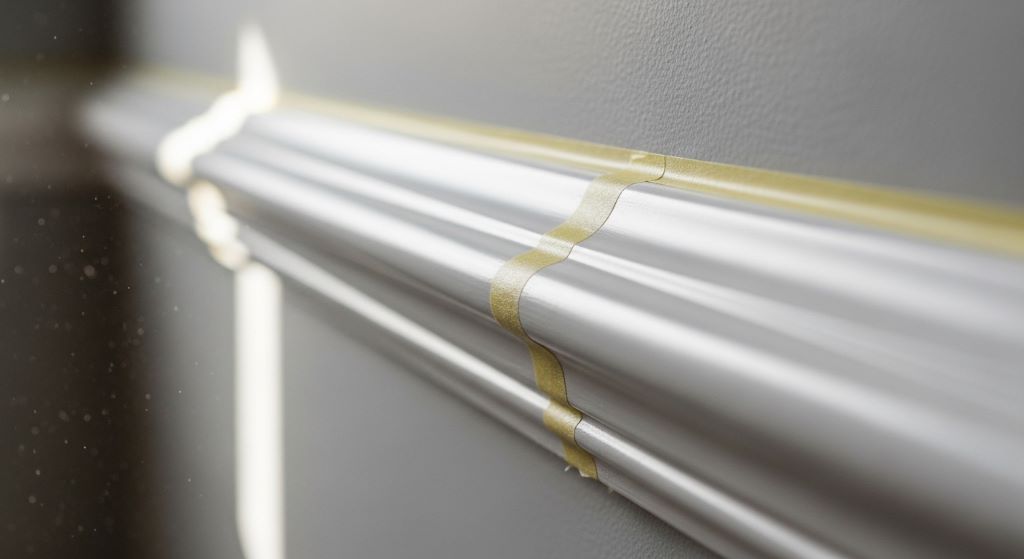
Timing matters when it comes to tape removal. Remove it too early, and the paint may smear. Wait too long, and the tape can bond to the surface and pull paint away when removed.
The best time to remove painter’s tape is when the paint is still slightly tacky, not fully dry. This is usually 30 to 60 minutes after your final coat, depending on humidity and temperature. At this stage, the paint film is formed but still flexible. Therefore, it separates cleanly from the tape without cracking or peeling.
To remove the tape, pull it back slowly at a 45-degree angle. Do not yank it away quickly. A slow, steady pull gives you the most control and the cleanest edge. If the tape starts to pull paint with it, score the edge with a utility knife first. Run the blade carefully along the tape line before pulling.
If you let the tape dry completely and it pulls paint when removed, do not panic. Touch up the edge with a small brush. A steady hand and the right color will fix the problem easily.
Common Mistakes to Avoid
Even experienced DIYers make mistakes with painter’s tape. Here are the most common ones and how to avoid them.
Leaving tape on too long is a frequent problem. Painter’s tape is not designed to stay on walls for weeks. Most brands recommend removing it within 14 days. The longer you leave it, the harder it is to remove cleanly.
Using the wrong type of tape is another issue. Regular masking tape is not the same as painter’s tape. Masking tape leaves a sticky residue and is more likely to pull off paint underneath. Always use a tape specifically labeled for painting.
Not pressing down the edge is probably the biggest mistake of all. You can use the best tape in the world, but if the edge is not sealed, paint will bleed underneath. Take the extra 30 seconds to press the tape down firmly along its entire length.
Painting in the wrong direction is also something to watch. Always stroke your brush or roller away from the tape. This keeps wet paint from being pushed under the tape edge.
Tips for Getting Perfectly Straight Lines
Straight lines are the goal of every paint job. Here are a few extra tips to help you achieve them.
Use a level or a chalk line to mark your tape line before you apply the tape. This is especially helpful for two-tone walls or accent stripes. A chalk line gives you a perfectly straight guide to follow.
Work in good lighting. Shadows can make it hard to see whether your tape is perfectly aligned. A bright work light aimed at the wall reveals any misalignments before you start painting.
Step back and look at your tape from a distance before painting. Sometimes a small misalignment that is hard to see up close becomes obvious from a few feet away.
Additionally, take your time. Taping is not the most exciting part of a paint job. However, it is the part that determines how professional your finished work looks. A well-taped room makes every other step easier.
A Smart DIY Painting Guide Summary for Beginners
If you are new to painting, following a structured DIY painting guide approach will save you time and effort. Here is a quick overview of the process:
- Clean and dry your surface before taping.
- Choose the right tape for your surface type.
- Apply tape slowly and press the edge down firmly.
- Seal the tape edge with a thin coat of existing wall color before painting.
- Paint away from the tape, not toward it.
- Remove tape while paint is still slightly tacky.
- Pull the tape at a 45-degree angle, slowly and steadily.
Following these steps in order gives you consistent results every time.
Conclusion
Using painter’s tape correctly is one of the simplest ways to elevate the quality of your paint job. It does not require special skills or expensive tools. What it requires is preparation, attention to detail, and a little patience.
Choosing the right tape for your surface, pressing it down firmly, sealing the edge before painting, and removing it at the right time are the four pillars of a clean result. Additionally, avoiding common mistakes like leaving tape on too long or painting in the wrong direction will save you from frustrating touch-ups.
Whether you are a first-time painter or someone looking to sharpen their technique, these steps will help you achieve results that look professional. A good paint job starts long before the brush hits the wall. It starts with the tape.
Frequently Asked Questions
How long can I leave painter’s tape on the wall before removing it?
Most painter’s tapes are designed to be removed within 14 days. For best results, remove the tape within a few hours of your final coat, while the paint is still slightly tacky.
Why does paint bleed under my painter’s tape?
Paint bleeds under tape when the edge is not pressed down firmly or when the surface is uneven. Always press the tape edge with a fingernail or putty knife and seal it with a coat of your existing wall color before applying the new paint.
Can I use painter’s tape on freshly painted walls?
You should wait at least 24 hours before applying painter’s tape over latex paint. For best results, wait 30 days for the paint to fully cure. Applying tape too soon can pull up the fresh paint when removed.
What is the difference between masking tape and painter’s tape?
Masking tape has a stronger adhesive and is not designed for painted surfaces. It can leave sticky residue and pull off paint. Painter’s tape uses a gentler adhesive that removes cleanly without damaging surfaces.
How do I get sharp lines on textured walls?
For textured walls, press the tape down as firmly as possible, then apply a thin bead of paintable caulk along the inner tape edge. Let it dry before painting. This seals the gap between the tape and the uneven surface, preventing paint from bleeding through.
Related Topics:
How Tall Is a Standard Door Frame: Complete 2025 Guide for Homeowners and Builders
How to Choose the Right Garage Door for Canadian Weather and Style