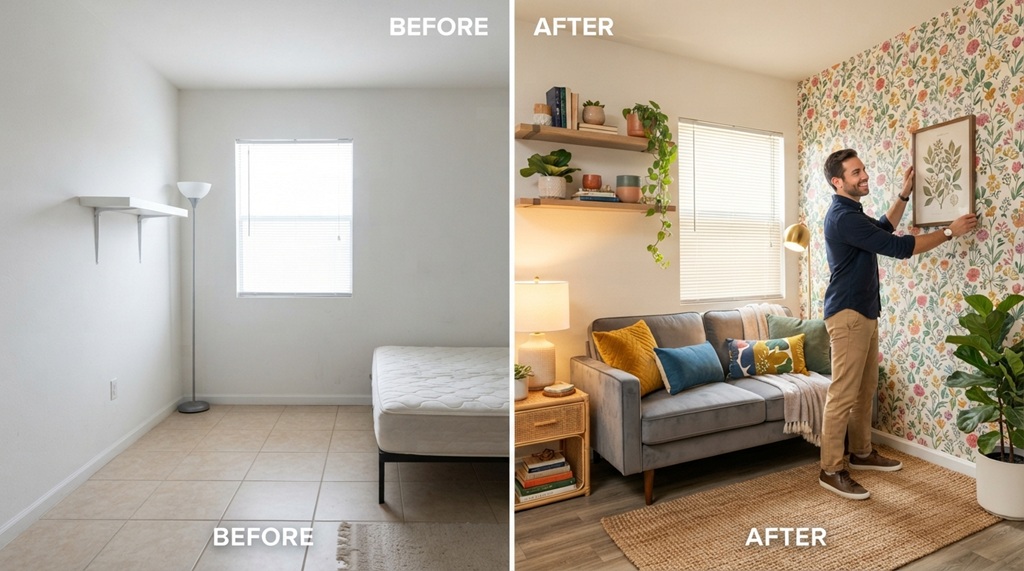
To plan a renter-friendly makeover on a budget, start with your lease. Set a firm spending limit. Then pick one room and choose upgrades you can fully undo when you move out.
This approach protects your security deposit and keeps costs low. It also stops you from spreading your money too thin. A small, focused plan beats a dozen random purchases.
This guide walks you through the whole process. You will learn how to check your lease, split your budget, choose removable upgrades, and shop smart. You will also learn a simple trick that keeps every change reversible.
Check Your Lease and Set a Reversibility Rule First
Read your lease before you buy anything. It tells you what you can change and what needs written permission. A quick check now saves you from a costly mistake later.
Read the Lease and Ask Your Landlord
Look for rules about paint, nails, wallpaper, and fixtures. Some leases ban all wall changes. Others allow paint if you restore the original color.
If a rule is unclear, ask your landlord in writing. An email works well. Many landlords say yes when you explain your plan. Some even offer to pay for paint.
Take Dated Photos Before You Start
Photograph every room in good light. Capture walls, floors, cabinets, and fixtures. Save the photos with the date.
These photos prove the original condition of your home. They help you if a dispute comes up over your deposit. Take a second set when you finish the makeover.
Use the “Reversibility Rule”
Here is a simple rule most guides skip. Before you buy or start any item, ask one question: “Can I undo this in under an hour?”
If the answer is yes, go ahead. If the answer is no, skip it or ask for permission. This one question keeps your whole project safe.
Set a Realistic Budget and Choose One Focus Area
Decide your total budget first. Then spend most of it on one area. A single finished room looks better than five half-done ones.
Split Your Budget Into Three Parts
Try this split as a starting point. Put 70% toward the main upgrades. Put 20% toward small decor items. Keep 10% as a buffer for surprises.
The buffer matters more than you think. Prices change. Paint runs out. A tool breaks. With a cushion, these small problems will not stop your project.
Pick the Room That Affects Your Daily Life Most
Choose the space you use every day. For most people, that is the living room or bedroom. Renters who work from home might pick a desk corner.
Ask yourself, “Which room annoys me most?” Start there. You will feel the payoff quickly. That boosts your motivation to finish.
Write a Simple One-Page Plan
List your goal, your budget, and your top five changes. Add a target style, such as warm and cozy or bright and minimal. Save two or three photos for inspiration.
A one-page plan keeps you focused in the store. It helps you say no to impulse buys. You will also finish faster.
Pick Removable Upgrades That Make the Biggest Visual Impact
The best renter upgrades change how a room looks without changing the room itself. Focus on walls, light, hardware, and floors. These four areas give the most visual change for the lowest cost.
Walls: Paint, Peel-and-Stick, and Art
Walls take up the most visual space. So they change a room the most.
- Removable wallpaper: Peel-and-stick wallpaper works well on one accent wall. Test a small hidden spot first.
- Paint with approval: If your landlord agrees, paint one wall. Keep the leftover can so you can touch up later.
- Adhesive hooks and strips: These hold frames and light items without nails. Check the weight limit on the package.
- Leaning art: Rest large frames or mirrors on a shelf or the floor. This adds style with zero holes.
Lighting: The Fastest Way to Change the Mood
Harsh overhead lights make a room feel cold. Warm, layered light makes it feel like home.
Swap bulbs for a warm white tone. Add a floor lamp and a table lamp. Plug-in wall sconces give you a built-in look with no wiring. String lights also add a soft glow for very little money.
Hardware and Fixtures: Small Swaps, Big Change
Cabinet knobs and drawer pulls are easy to swap. Unscrew the old ones and store them safely. Screw in new ones with the same hole spacing.
You can do the same with a showerhead or a light shade, if your lease allows. Keep every original part in a labeled bag. Then you can reinstall it at move-out.
Floors: Rugs Do the Heavy Lifting
A large rug can hide dull or worn flooring. It also adds color, texture, and warmth. Pick a size that fits under the front legs of your sofa.
Use a non-slip pad underneath. This keeps the rug in place and protects the floor. Avoid tape or glue on the flooring.
Shop Smart to Stretch Every Decorating Dollar
Smart spending isn’t about buying less it’s about investing strategically in versatile pieces that deliver maximum impact without exceeding your budget. By prioritizing quality staples and hunting for high-end aesthetics at accessible prices, you can elevated every corner of your living space effortlessly. This same thoughtful approach applies to your workspace: seamlessly blending function and flair is essential for a space that feels curated rather than cluttered. Elevate your daily routine by exploring our guide on set up an adjustable desk for a productive home office, ensuring your work environment remains as ergonomically refined as it is aesthetically pleasing.
Start With What You Already Own
Shop your own home first. Move furniture to new spots. Swap pillows between rooms. Try a different lamp on a different table.
You may find that a fresh layout solves half your problems. It costs nothing. It also shows you what you truly need to buy.
Buy Second-Hand for Furniture and Decor
Thrift stores, online marketplaces, and community groups offer solid pieces at low prices. Look for sturdy wood furniture. A coat of removable finish or new hardware can make it feel new.
Check items in person when you can. Look for wobbly legs, stains, and odd smells. Bring a tape measure so the piece fits your space.
Watch for Sales and Compare Prices
Wait for seasonal sales on rugs, bedding, and lighting. Compare a few stores before you buy. Sign up for store emails to get first-order discounts.
Keep receipts for everything. Return anything that does not work. Do not keep an item just because you already bought it.
Try a Few Low-Cost DIY Projects
Simple DIY tasks add a personal touch. Wrap a plain lampshade in fabric. Frame a favorite fabric scrap as art. Add a peel-and-stick tile backsplash behind the stove.
Plan each project as a single afternoon task. Small wins keep your energy high.
Plan the Work in a Smart Order

A good order saves time and prevents rework. Work from the biggest changes to the smallest details. This way, you never undo your own effort.
Follow This Simple Order
- Declutter and clean. Remove items you no longer use. Wipe surfaces and walls.
- Handle walls. Paint or apply wallpaper first. Let everything dry fully.
- Fix the lighting. Swap bulbs. Add lamps.
- Add the rug and furniture. Position the large pieces next.
- Finish with decor. Hang art. Add plants, pillows, and throws.
Use a Weekend Timeline
Most single-room makeovers fit into two weekends. Use the first weekend for cleaning, walls, and lighting. Use the second for furniture, decor, and final touches.
Set small goals for each day. Finish one task before you start the next. You will stay calm and avoid a messy, half-done room.
Keep Everything Reversible With a Restore Box
A restore box makes move-out day easy. It holds every original item you replaced. It also holds the tools and notes you need to put things back.
What to Put in Your Restore Box
Use a simple plastic bin. Store these items inside:
- Original cabinet knobs, in a labeled bag
- Old light shades or bulbs
- Your leftover paint can, if you painted
- A screwdriver and a small drill bit
- A printed copy of your before photos and landlord emails
Do a Short Move-Out Check
Two weeks before you leave, open the box and review your list. Remove adhesive strips slowly to avoid wall damage. Reinstall the original hardware. Then take a final set of photos.
This step takes an afternoon. It gives you strong proof that you left the home in good shape. That helps you get your full deposit back.
Frequently Asked Questions
How much should I spend on a renter-friendly makeover?
Spend an amount you can afford without stress. Many renters start with a small budget for one room. Then they add more over time. Use a 70/20/10 split to keep the spending organized.
Can I paint a rental without losing my deposit?
Often, yes, but only with permission. Ask your landlord in writing. Many will allow paint if you restore the original color before you leave. Keep the leftover paint for touch-ups.
What are the best cheap upgrades for a rental?
Lighting, rugs, and removable wallpaper give the biggest change for the lowest cost. New cabinet hardware also helps a lot. Start with these four before you spend on anything else.
How do I hang art without making holes?
Use adhesive hooks or strips rated for the weight of your frame. Clean the wall first. You can also lean large frames on a shelf or dresser for a relaxed look.
How long does a small makeover take?
A single room usually takes one or two weekends. Cleaning and wall work take the most time. Decor goes quickly once the big steps are done.
Conclusion
A renter-friendly makeover works best when you plan it well. Check your lease, take photos, and set a clear budget. Focus on one room. Choose upgrades you can undo in under an hour.
Use lighting, rugs, wall covers, and new hardware for the biggest visual change. Shop second-hand and compare prices. Keep a restore box so move-out day stays simple.
Pick your first room today. Write your one-page plan. Then take the first small step this weekend.