
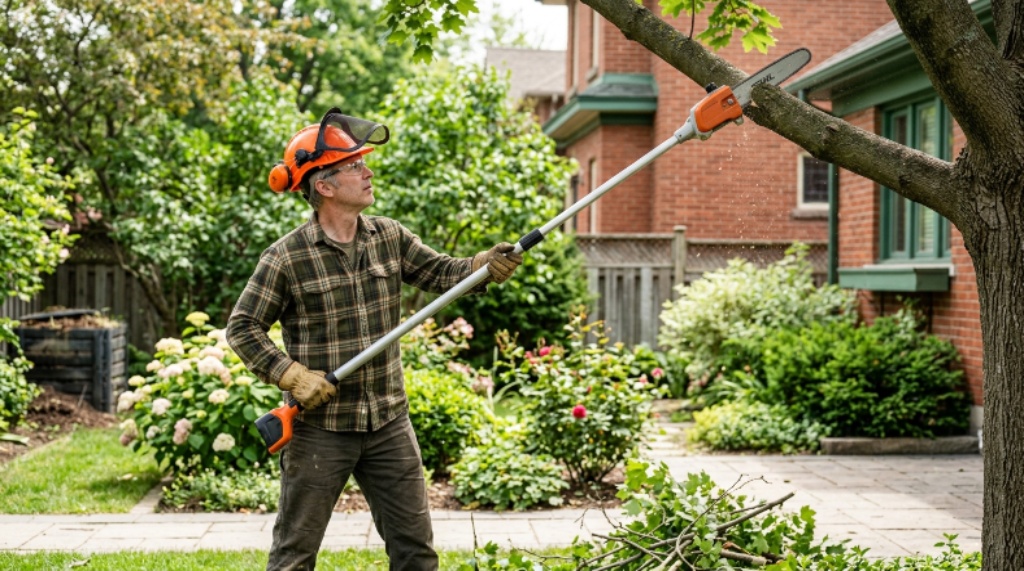
Trimming trees can feel intimidating the first time you pick up a pole saw. The tool is long, the branches are high, and the margin for error feels small. However, with the right knowledge and a calm approach, tree trimming becomes a manageable and even satisfying job.
A pole saw extends your reach without the need for a ladder. It lets you cut branches several metres above your head while keeping both feet safely on the ground. That is a significant safety advantage over other methods. However, like any power tool, it demands respect and preparation.
This beginner guide walks you through everything you need to know. From protective gear and pre-work checks to cutting methods and clean-up, you will be ready to tackle your first trimming job with confidence.
What a Pole Saw Is and When to Use One
A pole saw is essentially a pruning saw or chainsaw mounted on an extendable pole. The pole allows you to reach branches that would otherwise require a ladder or professional equipment. Most models extend between three and five metres, giving you access to a wide range of branch heights.
There are three main types. Manual pole saws use a blade you push and pull by hand. They are quiet, lightweight, and require no power source. Electric pole saws plug into a power outlet and are well suited for light to medium work around the home. Cordless battery-powered models offer the freedom of movement without a trailing cable. Gas-powered pole saws deliver the most cutting power but are heavier and produce more noise and vibration.
For most beginners trimming garden trees, an electric or cordless model is the most practical choice. They are easier to handle and require less maintenance than gas-powered alternatives. Therefore, if you are just starting out, one of these two options is likely your best fit.
Protective Gear You Should Never Skip
Safety starts before you touch the saw. The right protective equipment reduces the risk of injury significantly. This is one of the most fundamental pole saw safety tips any beginner should take to heart.
Wear a hard hat or helmet. Falling branches are the most common hazard during tree trimming, and a hard hat protects your head from direct impact. Eye protection is equally important. Sawdust, wood chips, and debris travel fast and far. Safety goggles or a full face shield keep your eyes protected throughout the job.
Hearing protection matters when using powered pole saws. Even electric models produce enough noise to cause discomfort and long-term hearing damage over repeated use. Foam earplugs or earmuffs are inexpensive and make a real difference.
Wear cut-resistant gloves to protect your hands. They improve your grip on the pole and shield your skin if the blade makes unexpected contact. Additionally, wear long-sleeved clothing and sturdy trousers. Avoid loose clothing that could snag on branches or get caught near a moving blade. Closed-toe boots with a firm grip are essential. Steel-toed boots offer even better protection if you have them.
Inspecting Your Pole Saw Before You Start
A quick inspection before every use can prevent accidents. Take two minutes to check the following before you begin.
Look at the blade or chain. Check for dull edges, missing teeth, or visible damage. A dull blade forces you to apply more pressure, which reduces your control and increases the risk of slipping. For manual saws, a sharp blade cuts smoothly with light effort. For powered models, check the chain tension. A chain that is too loose can derail during operation.
Check all pole connections. Extend the pole to its working length and test each joint. They should lock firmly with no wobble. A loose connection can shift unexpectedly during a cut, redirecting the blade in a dangerous direction.
For electric models, inspect the power cable for cuts, fraying, or exposed wires. Run the cable away from your cutting zone so there is no risk of accidental contact with the blade. For battery-powered models, make sure the battery is fully charged and seated securely. A battery that comes loose mid-cut is a serious hazard.
Assessing the Tree and Planning Your Cuts
Before you make a single cut, spend time assessing the tree and the surrounding area. This step is where beginners most often rush, and it is where many preventable accidents begin.
Stand back and look at the whole tree. Identify which branches need to come down and note their size, angle, and position. Look above and around each branch. Are there power lines nearby? Is there a fence, a shed, or a parked car in the fall zone? Identify where each branch is likely to land when it falls and make sure that area is clear.
Check the condition of the branches themselves. Dead or diseased branches may break unpredictably during cutting. They can crack before your cut is complete and fall in an unexpected direction. Additionally, branches under tension, those bent by the weight of other branches or bent downward under pressure, can spring back violently when released. Approach these with extra caution.
Tell anyone nearby to move well clear of the work area before you start. A falling branch travels faster than most people expect. A safe distance is at least twice the length of the branch you are cutting.

Core Pruning Techniques for Beginners
Good pruning techniques protect both you and the tree. Cutting in the wrong place or at the wrong angle can damage the tree and create hazards for future growth.
Where to Make Your Cut
Every branch connects to the trunk, or a larger branc,h at a slightly swollen area called the branch collar. This is where the tree’s healing tissue is concentrated. Always cut just outside the branch collar, not flush with the trunk. Cutting too close removes the healing tissue and leaves the tree vulnerable to disease. Cutting too far out leaves a stub that rots and invites pests.
For smaller branches, a single angled cut just outside the collar is sufficient. Aim for a cut angle of roughly 45 degrees, sloping away from the bud or trunk. This allows rainwater to run off the cut surface rather than pooling and encouraging rot.
The Three-Cut Method for Heavy Branches
Any branch thicker than about five centimetres should be removed using the three-cut method. This prevents the branch from tearing bark away from the trunk as it falls.
Make the first cut on the underside of the branch, about 30 centimetres out from where your final cut will be. Cut about a third of the way through. This undercut prevents downward tearing when the branch begins to fall.
Make the second cut on the top of the branch, slightly further out from the first cut. Cut all the way through. The branch will fall cleanly, and the undercut prevents bark stripping.
Make the third and final cut just outside the branch collar to remove the remaining stub. This clean final cut is where the tree’s healing begins.
Cutting Angle and Pole Positioning
Keep the pole at a slight angle rather than holding it perfectly vertical. A slight angle gives you better control and reduces vibration feedback through your arms. Avoid reaching directly overhead with a powered saw. Position yourself slightly to the side of the branch so that if it falls, it does not come straight down on you.
Use short, controlled strokes with a manual saw. For powered models, let the motor do the work. Applying too much pressure wears the blade faster and reduces accuracy. Smooth, steady contact produces cleaner cuts and keeps you in control throughout.
Managing Falling Branches Safely
Controlling where branches fall is a critical part of safe tree trimming. Even with careful planning, branches sometimes behave unpredictably.
Never stand directly beneath a branch you are cutting. Position yourself to the side and slightly behind the cutting point. This keeps you outside the primary fall zone. If a branch begins to fall in an unexpected direction, step back and away. Do not try to redirect it with the pole.
For larger branches, consider using a rope. Tie one end around the branch before cutting and have a second person hold the other end from a safe distance. As the cut completes, the rope allows the branch to be guided away from hazards as it falls. This technique is especially useful near fences, buildings, or garden features you want to protect.
Work on one branch at a time and remove cut material from the work area before moving to the next branch. A cluttered ground area increases your risk of tripping, which is especially dangerous when you are holding a powered tool.
After the Job: Cleaning Up and Storing Your Saw
Clean-up is part of the job. Clear all cut branches and debris from the work area promptly. Stack larger branches neatly for collection or disposal. Chip smaller material if you have a shredder, or bag it for green waste.
After use, clean your pole saw before storing it. Wipe the blade or chain with a dry cloth to remove sap and wood residue. Apply a light coat of oil to the blade or chain to prevent rust. For electric and battery models, store the battery separately at room temperature to preserve its lifespan.
Retract and lock the pole before storing. Hang or stand the saw in a dry location where the blade cannot make contact with other items. Keeping your equipment clean and well stored extends its life and ensures it is safe and ready for next time.
Conclusion
Using a pole saw safely comes down to preparation, patience, and the right technique. Always wear full protective gear before you start. Inspect your tool carefully and assess the tree and its surroundings before making any cut. Apply solid pruning techniques, including the three-cut method for heavier branches, and always manage your fall zones carefully.
These pole saw safety tips give beginners a clear and reliable foundation. Good pruning techniques protect both you and the health of your trees. Take your time, work methodically, and never rush a cut. With the right approach, tree trimming becomes a straightforward and rewarding part of home garden maintenance.
Frequently Asked Questions
Do I need any experience to use a pole saw for the first time?
No prior experience is required, but preparation is essential. Read the manufacturer’s manual for your specific model, wear the correct protective gear, and start with smaller branches to build your confidence before tackling larger ones.
How high can a pole saw safely reach?
Most extendable pole saws reach between three and five metres from the ground. When combined with your own height and arm extension, this allows you to trim branches up to six or seven metres high. For anything higher, consult a professional arborist.
Can I use a pole saw near power lines?
No. Never use a pole saw near overhead power lines under any circumstances. The pole can conduct electricity, and branches falling onto live lines create serious hazards. Contact your electricity provider or a licensed arborist for any work near power infrastructure.
How do I know if a branch is under tension before cutting?
Look at the branch carefully before cutting. If it is bent downward by its own weight or by another branch resting on it, it is likely under tension. When you cut it, it may spring upward or sideways. Use the three-cut method and stand to the side to reduce your exposure if the branch moves unexpectedly.
How often should I sharpen the blade on a manual pole saw?
Sharpen the blade whenever you notice it requires more effort to cut or produces ragged rather than clean cuts. For regular home use, this is typically after every few sessions. A sharp blade is safer and faster than a dull one, so do not delay sharpening when the signs appear.