
Want to refresh your home decor without breaking the bank? Peel and stick arch wall decals offer a simple, affordable solution. These removable stickers bring style and personality to any room. They’re DIY-friendly, require no special tools, and suit every skill level. Imagine transforming a plain wall into a vibrant, artistic focal point in minutes. This guide covers everything you need to know about creating and applying your own arch wall decals. Let’s dive into this creative, budget-friendly project!
What Are Peel and Stick Arch Wall Decals?
Peel and stick arch wall decals are adhesive vinyl stickers shaped like arches. They add elegance to walls without permanent changes. You can find designs like rainbow wall stickers, boho arch wall stickers, or watercolor sun wall stickers. These decals suit various aesthetics, from scandinavian simplicity to tropical leaf decals. They’re easy to apply and remove, making them perfect for renters or frequent redecorators. Most use eco-friendly latex digital printing, ensuring non-toxic, safe materials.
Benefits of DIY Peel and Stick Arch Wall Decals
Why choose DIY over store-bought decals? You control the design, size, and color. DIY decals save money and spark creativity. They’re customizable, letting you craft unique designs like family trees or business logos. Plus, they’re made with green-guard gold certification materials for safety. You can create textured arch wall stickers or glow-in-the-dark designs for extra flair. Repositionable stickers allow adjustments without wall damage. It’s a fun, low-risk project for all.
Materials Needed for Your DIY Arch Wall Decal
Gather these supplies before starting your project. Most are affordable and easy to find. Check local store prices or online retailers like The Home Depot for deals. Free shipping options can save you money. Here’s what you need:
- Adhesive vinyl or textured vinyl (choose eco-friendly options).
- Scissors or a craft knife for precise cuts.
- Painter’s tape to secure designs during application.
- A ruler or measuring tape for accuracy.
- A pencil for sketching arch shapes.
- Installation materials like a squeegee for smooth application.
- Optional: glow-in-the-dark vinyl or textured adhesive vinyl for unique effects.
Pro tip: Check manufacturer documentation for vinyl quality. Customer reviews on platforms like Amazon Prime offer insights.
Step-by-Step Guide to Creating Your DIY Arch Wall Decal
Follow these steps to craft and apply your arch wall decal. Each step ensures a professional finish. Let’s make your vision come to life.
Step 1: Plan Your Design
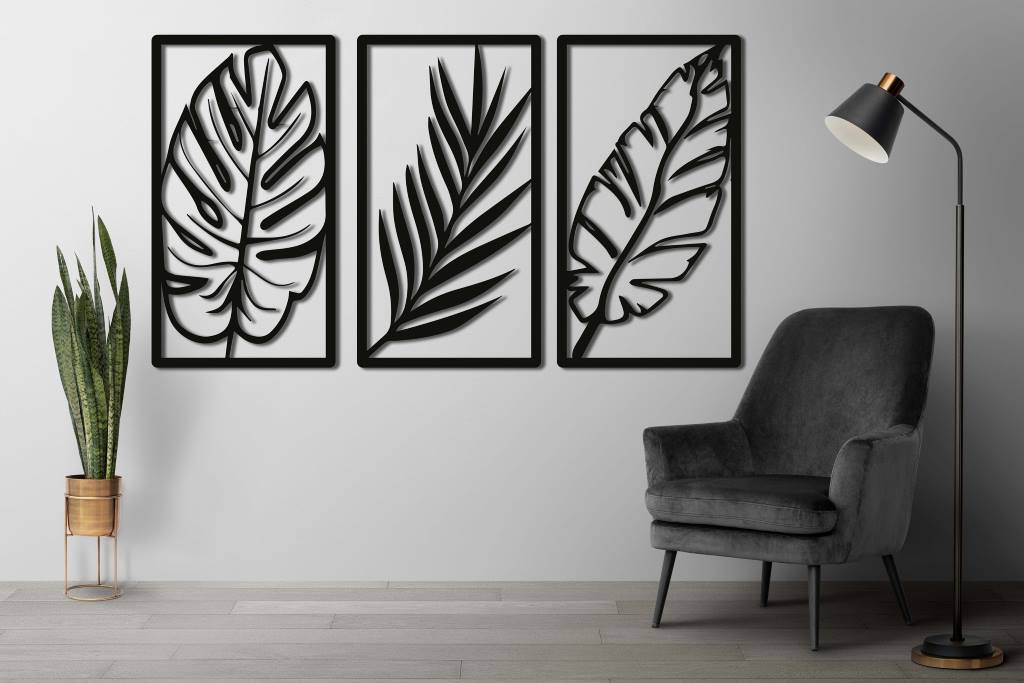
Choose a style that matches your space. Love nature? Try tropical leaf decals or peony decals. Prefer modern vibes? Go for minimalist style or skinny arch wall stickers. Sketch your arch shape on paper first. Consider color variations like watercolor checkered wallpaper or autumn rainbow wall stickers. For inspiration, look at designs by artists like Michelle Thompson or Roman clay mural techniques. Custom design arch wall stickers add a personal touch.
Step 2: Measure and Cut the Vinyl
Measure your wall to determine decal size. Use a ruler for precision. Trace your arch design onto the adhesive vinyl. Cut carefully with scissors or a craft knife. For complex designs like hand-painted designs or desert arches, use a cutting machine if available. Ensure clean edges for a polished look. Save extra vinyl for repositionable stickers or future projects.
Step 3: Prepare the Wall
Clean your wall thoroughly before applying the decal. Dust or grease can weaken adhesion. Use a damp cloth and let it dry. Apply painter’s tape to mark where the decal will go. This ensures straight placement. Check application instructions for your vinyl type. Some textured vinyl requires extra pressure for adhesion.
Step 4: Apply the Decal
Peel the backing off your adhesive vinyl slowly. Place the decal on the wall, starting from the top. Use a squeegee to smooth out bubbles. For large designs like modular murals or giant peel and stick decals, work in sections. Repositionable stickers allow adjustments if needed. Press firmly to secure the decal. Step back and admire your work!
Step 5: Add Finishing Touches
Enhance your decal with creative touches. Pair it with limewash paint techniques for a textured look. Add complementary decals like rising sun wall stickers or boho arch wall stickers. For a bold statement, combine with a family name or business logo decal. Ensure all elements align with your home decor vision.
Tips for a Flawless Application
Applying decals can be tricky. These tips ensure a smooth process. Avoid common mistakes and achieve professional results.
- Test First: Apply a small piece of vinyl to check adhesion.
- Work Slowly: Rushing leads to bubbles or misalignment.
- Use Painter’s Tape: It helps position large decals accurately.
- Check Inventory Levels: Ensure you have enough vinyl before starting.
- Follow Instructions: Manufacturer documentation prevents errors.
- Consider Lighting: Glow-in-the-dark decals shine in dim rooms.
Creative Ideas for Arch Wall Decals
Need inspiration? Here are popular design ideas. Each suits different tastes and spaces. Mix and match for a unique look.
- Rainbow Wall Sticker: Brightens kids’ rooms or play areas.
- Watercolor Sun Wall Sticker: Adds warmth to living spaces.
- Boho Arch Wall Stickers: Perfect for eclectic, cozy vibes.
- Peel & Stick Wall Art: Combines arches with botanical trends.
- Custom Design Arch Wall Stickers: Personalize with names or quotes.
- Desert Arches: Evokes earthy, minimalist style.
Check customer reviews for design inspiration. Platforms like Amazon Prime showcase trending styles.
Why Choose Eco-Friendly Materials?
Eco-friendly latex digital printing ensures safe, non-toxic decals. Green-guard gold certification guarantees low chemical emissions. USA-made vinyl supports local businesses. These materials suit families with kids or pets. They’re durable and easy to clean. Choose textured adhesive vinyl for added depth. Your DIY project can be stylish and sustainable.
Where to Buy Materials
Find supplies at trusted retailers. The Home Depot offers adhesive vinyl and painter’s tape. Amazon Prime provides free shipping on many items. Check local store prices for deals. Online platforms often have customer service for quick queries. Sign up for newsletters to catch sales. Always verify inventory levels before ordering.
Maintaining Your Peel and Stick Arch Wall Decals
Peel and stick decals are low-maintenance. Dust them lightly with a soft cloth. Avoid harsh chemicals that damage vinyl. Repositionable stickers can be moved if needed. For textured vinyl, use a damp cloth for stubborn stains. Check manufacturer documentation for care tips. Proper maintenance keeps decals vibrant for years.
Troubleshooting Common Issues
Facing issues? Here’s how to fix them. These solutions address common DIY challenges.
- Bubbles: Smooth with a squeegee or pop with a pin.
- Peeling Edges: Press firmly or apply heat with a hairdryer.
- Misalignment: Use painter’s tape to reposition accurately.
- Poor Adhesion: Clean the wall thoroughly before reapplying.
Contact customer service for specific vinyl issues. They often provide quick solutions.
The Future of Home Decor with Peel and Stick Decals
Peel and stick decals are a growing trend. Fashion trends lean toward minimalist style and botanical designs. Modular murals and giant peel and stick decals dominate modern interiors. Innovations like glow-in-the-dark vinyl add fun elements. DIY-friendly materials make decorating accessible. Stay ahead by experimenting with creative wall decal designs.
FAQs
What Are Peel and Stick Arch Wall Decals?
They’re adhesive vinyl stickers shaped like arches. Easy to apply and remove. Perfect for home decor.
Can I Reuse Peel and Stick Decals?
Yes, repositionable stickers can be reused. Check manufacturer documentation for reuse limits.
Are Peel and Stick Decals Safe for Walls?
Yes, they’re non-toxic and wall-safe. Use eco-friendly latex digital printing for added safety.
How Do I Remove Peel and Stick Decals?
Peel slowly from one corner. Use heat if needed. Clean residue with a damp cloth.
Where Can I Buy DIY Decal Materials?
Try The Home Depot or Amazon Prime. Check inventory levels and free shipping options.
Start Your DIY Journey Today
Peel and stick arch wall decals transform spaces with ease. They’re affordable, customizable, and fun to create. From boho arch wall stickers to minimalist designs, the possibilities are endless. Follow this guide to craft your own. Use eco-friendly materials for a sustainable touch. Ready to refresh your home? Start your DIY peel and stick arch wall decal project today! Share your creations in the comments or tag us on social media.