Getting your roof replaced through insurance can feel overwhelming. However, knowing what inspectors look for makes the process much smoother. This guide walks you through everything you need to prepare for an insurance roof inspection.
Understanding the Insurance Roof Inspection Process
Insurance companies send inspectors to assess roof damage before approving replacement claims. These professionals examine your roof to determine if the damage warrants a full replacement or just repairs. Therefore, understanding their evaluation criteria helps you prepare properly.
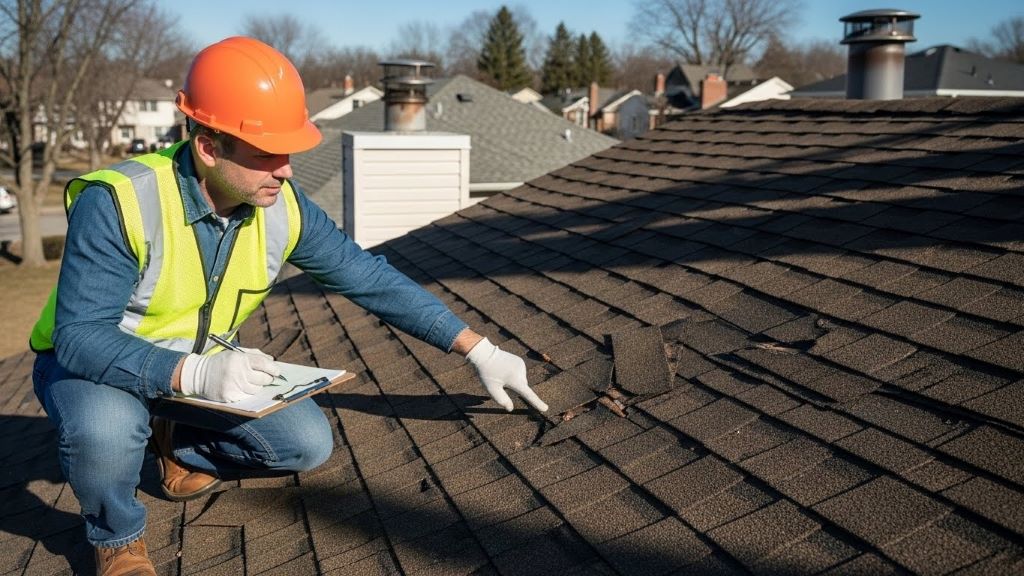
Most inspections take between 30 minutes to two hours. The inspector will photograph damage, measure your roof, and document their findings. Additionally, they will review your policy coverage to see what types of damage qualify for replacement.
Pre-Inspection Preparation Steps
Before the inspector arrives, you should gather important documents. Collect your insurance policy, previous inspection reports, and any maintenance records. These documents show you have maintained your roof properly.
Clear the area around your home. Move vehicles, patio furniture, and children’s toys away from the house. This gives the inspector safe access to all sides of your roof. Furthermore, trim any overhanging tree branches that might obstruct their view.
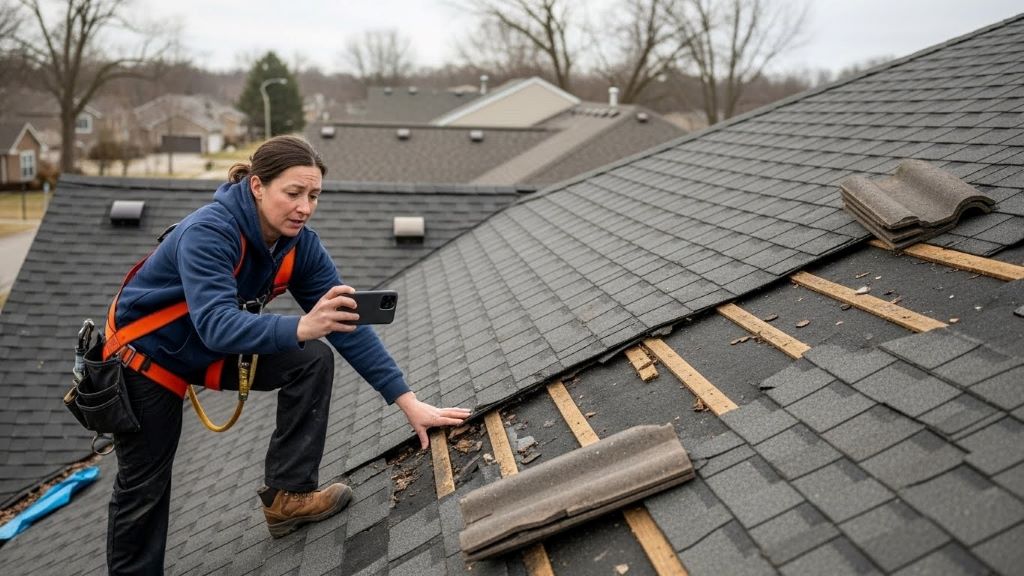
Take your own photos of visible damage. Document missing shingles, sagging areas, and water stains on ceilings. These photos serve as your personal record of the damage.
Interior Inspection Checklist
Inspectors start inside your home to look for signs of roof failure. They check attics, ceilings, and walls for water damage indicators.
Attic Examination Points
The attic reveals critical information about roof condition. Inspectors look for water stains on rafters and decking. They also check for proper ventilation, which affects roof lifespan. Additionally, they examine insulation for moisture damage or mold growth.
Daylight visible through the roof boards indicates serious damage. Similarly, sagging roof decking suggests structural problems. These issues strongly support replacement claims.
Ceiling and Wall Inspection
Water stains on ceilings often appear as brown or yellow discoloration. Inspectors measure and photograph these areas. They also check walls near the roofline for moisture damage.
Peeling paint or bubbling drywall indicates water intrusion. Therefore, document these signs before the inspection. Cracked plaster near ceiling corners also suggests roof problems.
Exterior Roof Inspection Checklist
The exterior examination is the most comprehensive part of the inspection. Inspectors climb onto your roof to assess its overall condition.
Shingle Condition Assessment
Missing, cracked, or curling shingles indicate wear and tear. According to Consumer Reports, asphalt shingles typically last 20 to 25 years depending on climate and maintenance. Inspectors count damaged shingles to determine if damage exceeds your policy threshold.
Granule loss appears as bare spots on shingles. This happens naturally with age but accelerates after hail damage. Check your gutters for excessive granule accumulation.
Shingle tabs should lie flat against the roof. Lifted or curled tabs allow water penetration. Moreover, consistent curling across large areas suggests the roof has reached the end of its lifespan.
Flashing and Seal Inspection
Flashing around chimneys, vents, and skylights prevents water intrusion. Inspectors check for rust, cracks, or separation from the roof surface. Damaged flashing often causes leaks even when shingles appear intact.
Roof valleys channel water off your roof. Therefore, inspectors pay special attention to valley flashing condition. Corroded or improperly installed valley flashing commonly leads to water damage.
Seal integrity around pipe boots and exhaust vents matters significantly. Cracked or missing rubber boots allow water to enter your home.
Structural Element Review
Inspectors look for sagging rooflines or uneven surfaces. These indicate underlying structural damage to decking or rafters. Similarly, they check for proper roof slope, which affects drainage.
Fascia and soffit condition matters too. Rotted wood in these areas suggests prolonged water exposure. Additionally, inspectors examine gutters for proper attachment and functionality.
Storm Damage Documentation
If claiming storm damage, specific documentation strengthens your case. Different weather events leave distinct damage patterns.
Hail Damage Indicators
Hail creates circular dents in shingles with exposed underlayment. Inspectors measure dent size and count impacts per square foot. Severe hail also damages metal vents, skylights, and satellite dishes.
Check your air conditioning unit for dents. Similarly, examine window screens and siding. Consistent damage patterns across all surfaces support your claim.
Wind Damage Signs
Wind typically tears shingles from roof edges and corners first. Inspectors look for missing shingles in these vulnerable areas. Lifted shingle tabs indicate wind speeds exceeded your roof’s rating.
Debris impact from fallen branches causes punctures or tears. Therefore, document any tree damage near your home. Wind-driven rain can also cause water intrusion even without visible shingle damage.
Essential Documents for the Inspection
Bring specific paperwork to your inspection appointment. Your insurance policy outlines coverage limits and deductibles. Previous inspection reports establish your roof’s baseline condition.
Proof of regular maintenance shows responsible homeownership. Save receipts from gutter cleanings, minor repairs, and roof treatments. These records demonstrate the damage resulted from a covered event, not neglect.
Weather reports from your area support storm damage claims. The National Weather Service provides historical weather data for your location. Print reports showing hail size, wind speeds, or storm dates matching your damage timeline.
Common Inspection Red Flags
Certain findings may complicate your claim approval. Pre-existing damage from lack of maintenance often results in claim denials. Inspectors distinguish between sudden storm damage and gradual deterioration.
Improper previous repairs suggest neglect. DIY fixes using incorrect materials raise concerns about overall roof care. Therefore, always hire licensed contractors for repairs.
Missing shingles in scattered patterns indicate age-related failure rather than storm damage. Similarly, uniform wear across the entire roof suggests normal aging. Insurance typically covers sudden, accidental damage, not wear and tear.
Post-Inspection Follow-Up
After the inspection, review the report carefully. Insurance companies typically provide written findings within a week. The report details damage extent, estimated replacement costs, and claim approval status.
If your claim gets denied, request a detailed explanation. You have the right to dispute the decision with additional documentation. Consider hiring an independent roofing contractor for a second opinion.
Approved claims include a settlement amount based on your coverage. This amount factors in your deductible, depreciation, and policy limits. Additionally, you may receive partial payment initially with the remainder after work completion.
Conclusion
A successful insurance roof inspection requires thorough preparation and documentation. Understanding what inspectors evaluate helps you present the strongest possible claim. Remember to document all damage with photos, gather maintenance records, and clear access to your roof. Whether dealing with storm damage or general wear, proper preparation increases your approval chances significantly. By following this comprehensive checklist, you can navigate the insurance inspection process with confidence and secure the roof replacement your home needs.
Frequently Asked Questions
How long does an insurance roof inspection take?
Most insurance roof inspections take between 30 minutes and two hours, depending on your roof’s size and complexity. The inspector needs time to examine both interior and exterior areas thoroughly. Larger or multi-story homes typically require more time for complete assessment.
What happens if the inspector finds pre-existing damage?
Pre-existing damage from poor maintenance may result in claim denial or reduced settlement amounts. Insurance covers sudden, accidental damage rather than gradual deterioration. However, insurers might still approve replacement if storm damage exceeds a certain threshold, even with some pre-existing wear.
Can I be present during the roof inspection?
Yes, homeowners can and should be present during insurance roof inspections. Being there allows you to point out specific damage areas and ask questions. Additionally, you can ensure the inspector examines all problem areas thoroughly. However, stay off the roof itself for safety reasons.
How much roof damage is needed for insurance to approve replacement?
Most insurance policies require damage to a certain percentage of the roof, typically 25% to 40%, before approving full replacement. The exact threshold depends on your specific policy terms. Inspectors count damaged shingles and calculate the percentage of total roof area affected.
What should I do if my roof replacement claim gets denied?
If denied, first request a detailed written explanation of the decision. Review your policy carefully to understand coverage limits and exclusions. Consider hiring an independent roofing contractor or public adjuster for a second assessment. You can formally dispute the denial by providing additional documentation or professional opinions supporting your claim.
Related Topics:
Seasonal Upkeep for Thatched or Slate Roofs: A Homeowner’s Tale
Want your Minecraft house to stand out? Master these epic roof designs