
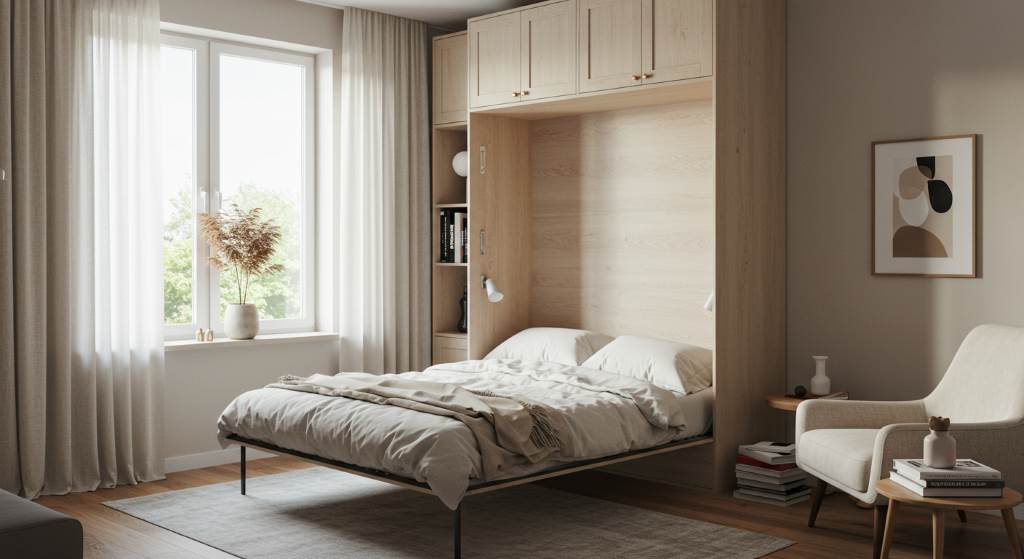
Want to maximize your living space without sacrificing comfort? DIY Murphy bed plans and hardware kits offer a smart solution for small homes or multi-purpose rooms. These fold-down beds tuck neatly into a wall or cabinet, freeing up floor space for other activities. Whether you’re a seasoned DIYer or a beginner, building a Murphy bed is achievable with the right plans and kits. This blog post explores how to create a functional, stylish bed using DIY Murphy bed plans and hardware kits, saving you money and space. I’ll share tips, costs, and personal insights to guide your project. Let’s dive in!
Why Choose a DIY Murphy Bed?
Murphy beds, also called wall beds, are perfect for small apartments, guest rooms, or home offices. They fold up when not in use, creating a versatile space. According to a 2023 study by the National Association of Home Builders, 60% of homeowners prioritize space-saving furniture in urban homes. DIY Murphy bed plans and hardware kits make this possible without breaking the bank. Unlike pre-built beds costing $3,000-$10,000, DIY options range from $500-$1,000, including materials and kits.
Moreover, building your own bed allows customization. You can choose wood types, finishes, or add features like shelves or desks. My friend Sarah built a queen-size Murphy bed for her studio apartment, transforming it into a daytime office. The process was straightforward with a hardware kit, and she saved thousands. Therefore, DIY Murphy beds combine affordability, functionality, and personal flair.
Benefits of Using Hardware Kits
Hardware kits simplify the construction of a Murphy bed. They include essential components like pistons, legs, and brackets, ensuring smooth operation. A 2024 report by Home Improvement Research Institute found that 70% of DIYers prefer kits for complex projects due to their detailed instructions. Kits eliminate guesswork, providing pre-engineered parts rated for specific mattress weights.
Additionally, kits enhance safety. Properly rated pistons prevent the bed from falling, a critical feature for households with kids. When I helped my brother build his Murphy bed, the kit’s clear guide and sturdy hardware made assembly stress-free. Most kits also support various bed sizes, from twin to king, offering flexibility. Thus, investing in a quality kit saves time and ensures durability.
Choosing the Right DIY Murphy Bed Plans
Selecting the right DIY Murphy bed plans is crucial for success. Plans should include a cut list, step-by-step instructions, and hardware compatibility. Free plans are available online, but paid ones, often $10-$20, offer more detail. Websites like Rockler or Create-A-Bed provide downloadable plans tailored to their kits, ensuring accuracy.
Consider your skill level and space constraints. Vertical plans suit tall rooms, while horizontal ones work in tight spaces. My cousin, a novice woodworker, chose a simple vertical plan from Create-A-Bed. It took him a weekend to complete, guided by clear diagrams. Also, ensure plans match your mattress size, typically up to 12 inches thick. Therefore, prioritize plans that align with your kit and room layout.
Essential Tools and Materials
Building a Murphy bed requires basic woodworking tools and materials. Here’s what you’ll need:
- Tools: Table saw, drill, jigsaw, clamps, stud finder, and paint sprayer.
- Materials: Plywood (3/4-inch for strength), 1×2 boards, screws, wood glue, and edge banding.
- Hardware Kit: Includes pistons, brackets, and legs, costing $200-$500.
Plywood costs around $200-$300, depending on quality. Baltic birch is ideal for fewer voids, ensuring a polished finish. According to Fine Woodworking, high-quality plywood reduces finishing time by 20%. I learned this when building a twin Murphy bed; cheaper plywood required extra sanding. Always check your kit’s material list to avoid overbuying. Thus, gathering the right tools and materials streamlines your project.
Step-by-Step Guide to Building a Murphy Bed
Step 1: Prepare and Cut Materials
Start by reviewing your DIY Murphy bed plans and hardware kit instructions. Cut plywood and boards according to the provided cut list. Use a table saw for precision, or a circular saw with a guide. Label each piece to stay organized. My neighbor, Tom, found labeling saved him hours during assembly. Apply edge banding to visible plywood edges for a professional look.
Step 2: Assemble the Bed Frame
Build the bed frame using 1×2 struts and plywood rails. Secure with wood glue and 2-inch screws, pre-drilling to prevent splitting. Attach the mattress support panels, ensuring they align with the kit’s templates. This step took me and my brother about two hours, thanks to clear kit instructions.
Step 3: Construct the Cabinet
Construct the cabinet using vertical plywood panels and a header. Secure to wall studs for safety, using a stud finder. My first attempt skipped this step, causing wobbling—don’t make that mistake! Install the hardware, like pistons and legs, following the kit’s guide. Paint or stain before final assembly for a polished finish.
Cost Breakdown and Savings
Building a DIY Murphy bed is budget-friendly compared to pre-built options. Here’s a typical cost breakdown:
- Hardware Kit: $200-$500
- Plywood and Lumber: $200-$400
- Miscellaneous (screws, glue, paint): $50-$100
- Total: $450-$1,000
Pre-built Murphy beds cost $3,000-$10,000, so DIY saves 70%-90%. A 2023 Houzz report noted that DIY furniture projects cut costs by 65% on average. I built a queen-size bed for $600, including a Rockler kit, saving $2,400 compared to a store-bought model. Additionally, customizing with affordable finishes like paint or stain enhances value. Therefore, DIY Murphy beds offer significant savings without compromising quality.
Customization Ideas for Your Murphy Bed
Personalize your Murphy bed to match your style and needs. Add faux cabinet doors or fluted panels for a modern look. My sister added shelves to her bed’s cabinet, creating a mini-library. You can also integrate a fold-down desk or LED lighting for functionality. Websites like HGTV suggest adding USB ports or reading lights for guest comfort.
Choose finishes like oak stain or chalk paint to elevate aesthetics. However, ensure decorative additions don’t hinder the bed’s operation. I once added heavy trim, which affected the pistons—stick to lightweight materials. Thus, customization makes your bed both practical and visually appealing.
Common Mistakes to Avoid
Avoid these pitfalls when building your Murphy bed:
- Skipping Wall Anchoring: Unsecured beds are unsafe and wobbly.
- Ignoring Mattress Thickness: Kits support up to 12-inch mattresses; thicker ones prevent closing.
- Deviating from Plans: Altering designs can affect hardware function.
My friend Mike ignored the stud-anchoring step, causing his bed to tilt. Following instructions prevents such issues. Also, double-check measurements before cutting to avoid waste. According to Woodworker’s Journal, 80% of DIY errors stem from misreading plans. Therefore, stick to your kit’s guidelines for a smooth build.
Where to Find Reliable Plans and Kits
Reputable sources for DIY Murphy bed plans and hardware kits include:
- Rockler: Offers detailed plans and kits ($200-$500) with lifetime warranties.
- Create-A-Bed: Provides free downloadable plans and adjustable mechanisms.
- Murphy Bed Depot: Known for clear instructions and free U.S. shipping.
I bought a Create-A-Bed kit for $299, and its video tutorials were a game-changer. Check customer reviews on Amazon or woodworking forums for kit reliability. Thus, sourcing from trusted vendors ensures quality and support.
Conclusion
DIY Murphy bed plans and hardware kits empower you to create a space-saving, stylish bed tailored to your needs. They’re affordable, customizable, and easier to build than you might think. With costs ranging from $450-$1,000, you save thousands compared to pre-built options. My experience building a Murphy bed taught me the value of clear plans and quality kits—it transformed my guest room into a multi-use space. Ready to reclaim your space? Grab a kit, follow the steps, and enjoy the results. Share your project ideas or questions in the comments below, or spread the word by sharing this post!
FAQs
What is a Murphy bed hardware kit?
A Murphy bed hardware kit includes pistons, brackets, legs, and instructions to build a fold-down bed, ensuring safe and easy operation.
How much does it cost to build a DIY Murphy bed?
Costs range from $450-$1,000, including a $200-$500 hardware kit, $200-$400 in lumber, and $50-$100 for miscellaneous supplies.
Can beginners build a Murphy bed?
Yes, beginners can build one using a hardware kit and detailed plans, requiring basic woodworking skills and tools.
What mattress size works with DIY Murphy beds?
Most kits support twin, full, queen, or king mattresses up to 12 inches thick and 85 pounds.
Where can I find free DIY Murphy bed plans?
Free plans are available from Create-A-Bed or Murphy Bed Depot, often included with hardware kits.