Deep frying creates delicious, crispy food that people love. However, the cost of replacing cooking oil frequently can add up quickly, especially for restaurants and busy home kitchens. Learning how to properly filter your fryer oil can dramatically extend its usable life, saving you money while maintaining food quality.
Many people throw away their frying oil far too early. With proper filtering and maintenance, you can reuse the same batch of oil multiple times without compromising taste or safety. This guide will teach you everything you need to know about filtering deep fryer oil effectively, whether you’re using basic manual methods or more advanced equipment.
Understanding Why Oil Needs Filtering
When you deep fry food, tiny particles break off and fall into the oil. Breading crumbs, batter bits, and food particles accumulate at the bottom of your fryer. These particles don’t just disappear. Instead, they continue cooking every time you heat the oil, eventually burning and creating dark, bitter flavors.
Burnt particles also accelerate oil breakdown. They cause the oil to darken faster and develop off flavors. Additionally, these bits increase the rate at which oil oxidizes and becomes rancid. Removing them through filtration significantly slows this degradation process.
Water content also affects oil quality. Food naturally contains moisture, which gets released during frying. This water creates foam and causes oil to break down more quickly. While filtration can’t remove all moisture, it helps by removing the food particles that trap water.
Furthermore, filtering removes some of the free fatty acids that form as oil degrades. These acids lower the smoke point and create unpleasant flavors. Regular filtering keeps these acids at manageable levels, extending the oil’s usable life.
Recognizing When Your Oil Needs Filtering
Knowing when to filter your oil is just as important as knowing how. Several clear signs indicate it’s time to clean your oil.
Visual inspection provides the first clue. Fresh oil appears light and clear. As it ages and accumulates debris, it becomes darker and cloudier. If you can’t see the bottom of your fryer basket when it’s submerged, the oil definitely needs filtering.
Foam formation is another telltale sign. Excessive foaming during frying indicates that particles and moisture have built up in the oil. Some foaming is normal, but if foam covers more than half the oil surface, filtration is overdue.
The smell test rarely fails. Fresh oil has a neutral or pleasant aroma. Degraded oil smells stale, rancid, or burnt. If the oil smells unpleasant when cold, filtering won’t solve the problem. The oil needs replacement instead.
Food quality also signals oil condition. If your fried items taste off, absorb too much oil, or don’t crisp properly, the oil has likely degraded beyond simple filtering. However, catching these issues early through regular filtering prevents them from occurring.
Manual Filtering Methods That Work
You don’t need expensive equipment to filter oil effectively. Several manual methods work well for home kitchens and smaller operations.
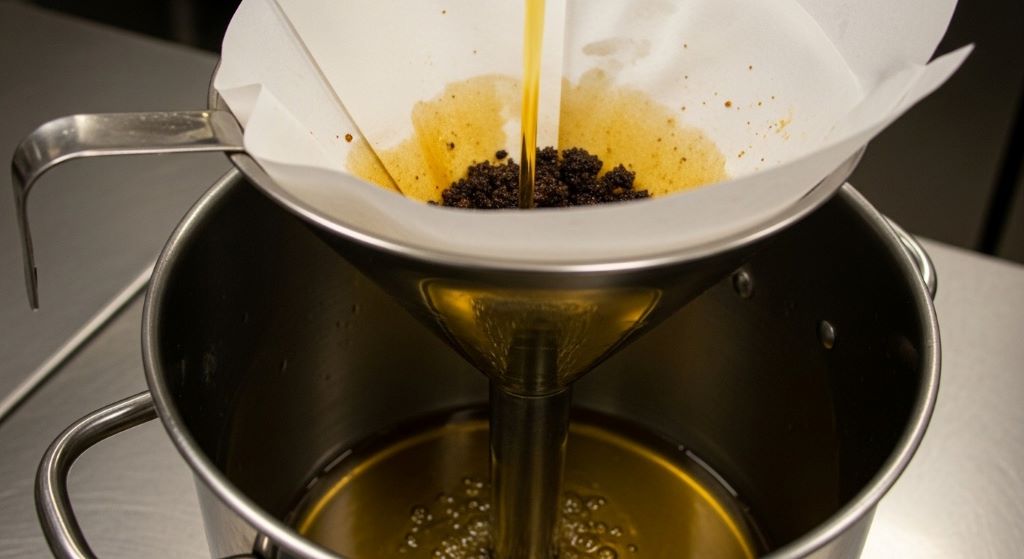
The cone filter method remains the most popular manual approach. Once the oil has cooled to a safe temperature, carefully pour it through a cone-shaped filter lined with cheesecloth or paper filters. Position the cone over a clean, heat-safe container. Gravity pulls the oil through while trapping particles in the filter.
Coffee filters work surprisingly well for this purpose. They’re inexpensive, readily available, and fine enough to catch most particles. However, they filter slowly, so patience is essential. Never rush this process, as forcing oil through can tear the filter and contaminate your clean oil.
Fine mesh strainers provide a faster alternative. Line a metal strainer with several layers of cheesecloth and position it over your container. This method filters more quickly than paper filters while still removing most debris. For best results, let the oil sit after straining to allow fine particles to settle, then carefully pour off the clear oil, leaving sediment behind.
Some people use specialized oil filtration bags. These reusable fabric bags feature very fine mesh that captures particles while allowing oil to flow through relatively quickly. They’re washable and can last for many filtering sessions, making them cost-effective over time.
Using Filtration Machines and Systems
Commercial kitchens and serious home cooks often invest in mechanical filtration systems. These devices make the process faster, easier, and more thorough than manual methods.
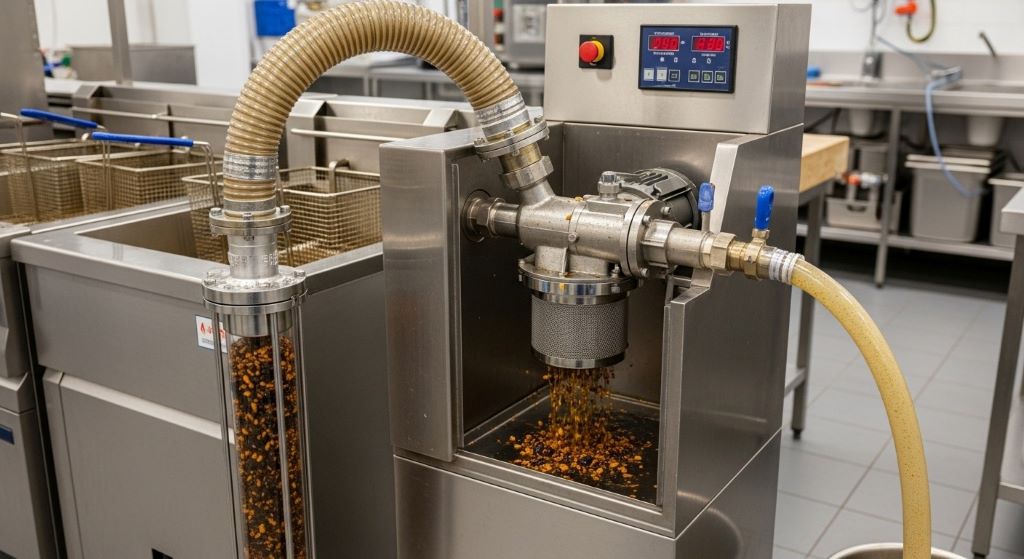
Portable filtration units feature a pump that draws oil through a filter and back into the fryer. These machines typically include a filtration cone filled with special filter powder or paper. The pump creates pressure that forces oil through the filter medium much faster than gravity alone.
Built-in filtration systems offer the ultimate convenience. Some modern fryers include integrated filtration chambers beneath the cooking vessel. At the touch of a button, these systems drain the oil through filters and pump it back up into the fryer. This automation makes filtering so easy that you can do it after every shift or cooking session.
An automatic oil filtration fryer takes convenience even further. These sophisticated units monitor oil quality and can filter automatically on a programmed schedule. They continuously remove particles during operation, keeping oil cleaner for longer periods. While expensive, they’re worthwhile investments for high-volume operations.
Countertop filtration machines provide a middle ground between manual methods and built-in systems. These standalone units accept oil from any fryer, filter it, and store it for reuse. They’re portable, relatively affordable, and work with multiple fryers.
Step-by-Step Manual Filtering Process
Following a systematic approach ensures safe, effective filtration every time. This process works for most manual filtering situations.
First, turn off the fryer and let the oil cool to approximately 150-170 degrees Fahrenheit. Oil at this temperature flows well but won’t burn you or melt filter materials. Never attempt to filter oil that’s too hot. Serious burns can result from splashing hot oil.
While the oil cools, remove large debris with a skimmer or spider strainer. Scoop out any visible food particles floating on the surface or settled at the bottom. This preliminary step extends filter life and speeds up the actual filtration process.
Next, prepare your filtering setup. Place your clean, dry storage container on a stable surface. Position your filter or strainer securely over the container. Make sure everything is stable and won’t tip over when you add oil.
Carefully ladle or pour the oil into the filter. Work slowly to avoid splashing. Fill the filter partway, then wait for oil to pass through before adding more. Rushing causes filter overflow and creates a mess.
Once all the oil has filtered through, examine it carefully. If it still looks cloudy or contains visible particles, filter it again through fresh filter material. Multiple passes through filters create cleaner results than a single pass through a clogged filter.
Finally, clean your empty fryer thoroughly before adding the filtered oil back. Wipe down all surfaces to remove any residual particles. This prevents contaminating your freshly cleaned oil with debris from the fryer walls.
Maintaining Oil Quality Between Filtrations
Filtering is important, but daily maintenance practices significantly impact how long your oil lasts. These simple habits maximize oil life.
Skim the oil surface regularly throughout the day. Remove floating particles before they sink and burn. This takes just seconds but prevents significant oil degradation. Keep a skimmer nearby and use it between batches.
Avoid overheating the oil. Higher temperatures accelerate chemical breakdown. Keep your fryer at the lowest temperature that still produces good results. Most foods fry perfectly well at 350-375 degrees Fahrenheit. Unnecessarily hot oil degrades faster.
Cover your fryer when not in use. Exposure to air causes oxidation, which shortens oil life. A simple lid or cover protects the oil from airborne contaminants and slows oxidation considerably.
Never add fresh oil to degraded oil. This might seem like a way to extend life, but old oil contaminates new oil, dragging down its quality. Always replace oil completely when it’s time, rather than topping up.
Salt and season food after frying, not before. Salt accelerates oil breakdown when heated. Similarly, highly acidic marinades and wet batters introduce moisture that degrades oil faster. Pat food dry before frying whenever possible.
Recognizing When Oil Must Be Replaced
Even with perfect filtering and maintenance, oil eventually reaches the end of its useful life. Knowing when to replace rather than filter saves you from serving subpar food.
The smoke point test provides a reliable indicator. If oil starts smoking well below its normal frying temperature, chemical changes have occurred that filtering can’t reverse. This oil needs replacement regardless of appearance.
Persistent dark color that doesn’t improve with filtering signals the end. While filtering removes particles, it doesn’t reverse chemical changes that darken oil. If oil stays dark brown or black after filtering, it’s time for fresh oil.
Viscosity changes also indicate terminal degradation. Oil that has become significantly thicker or syrupy has broken down chemically. These changes affect how food fries and how much oil food absorbs. Filtering won’t help at this stage.
Failed food quality represents the ultimate test. If properly prepared food consistently turns out greasy, poorly colored, or off-flavored, the oil has failed. Don’t waste more food trying to salvage bad oil.
Best Practices for Reusable Cooking Oil Tips
Implementing smart practices from the start maximizes the number of times you can reuse your oil. These strategies work whether you filter manually or use advanced equipment.
Keep different oils for different foods. Maintain separate batches for fish, chicken, and vegetables. Foods transfer flavors into oil, and these flavors transfer to subsequently fried items. Separating oils prevents unwanted flavor mixing.
Label and date your filtered oil. Write the filtration date on storage containers so you know how old the oil is. Even properly filtered oil has a finite shelf life. Most filtered oil remains usable for one to two weeks when stored properly.
Store filtered oil in a cool, dark place. Light and heat accelerate rancidity. If you won’t use the oil immediately, store it in an opaque container away from heat sources. Refrigeration can extend storage life even further.
Track your usage and filtration schedule. Keeping simple records helps you identify patterns and optimize your filtration timing. Note how many batches you fry between filtrations and adjust your schedule based on oil performance.
Invest in quality oil initially. Higher-quality oils with higher smoke points last longer and withstand more filtration cycles. While they cost more upfront, they prove more economical over time because they tolerate more reuse.
Choosing the Right Filtration Equipment
The best filtration method depends on your volume, budget, and frequency of use. Understanding your options helps you make smart equipment decisions.
For occasional home use, manual cone filters with paper or cloth filters work perfectly well. They’re inexpensive, require no power, and filter adequately for small batches. The slower speed doesn’t matter when you’re not filtering large volumes.
Busy home cooks who fry weekly might consider a small electric filtration pump. These affordable machines speed up the process significantly without requiring the investment of an automatic oil filtration fryer. They pay for themselves through oil savings within months.
Small restaurants and food trucks benefit from portable filtration machines with powder filters. These units handle moderate volumes quickly and provide thorough filtration that extends oil life considerably. They’re durable enough for daily use yet portable enough to move between stations.
High-volume operations should seriously consider fryers with built-in filtration. While the initial cost is substantial, the labor savings and extended oil life create impressive returns on investment. Staff can filter oil in minutes rather than the lengthy manual process.
Safety Considerations for Oil Filtration
Working with hot oil carries inherent risks. Following safety protocols prevents injuries and accidents.
Never filter oil while it’s at cooking temperature. Oil above 180 degrees Fahrenheit can cause severe burns. Always wait for oil to cool to a safe handling temperature before beginning filtration.
Wear appropriate protective equipment. Heat-resistant gloves protect your hands from residual heat. Long sleeves prevent splashing oil from reaching your skin. Safety glasses shield your eyes from potential splashes.
Keep filtration areas dry. Oil and water create dangerous splatter when combined. Ensure all containers, filters, and work surfaces are completely dry before starting. Clean up any spills immediately to prevent slipping.
Use stable, appropriate containers. Storage vessels must be heat-resistant and rated for hot liquids. Never use containers that might melt, crack, or tip over. Glass containers can shatter under thermal stress, so metal or food-grade plastic containers work better.
Dispose of used oil properly. Never pour oil down drains, as it clogs plumbing and harms wastewater systems. Instead, let used oil cool completely, then pour it into a sealed container for disposal or recycling. Many communities offer oil recycling programs.
Troubleshooting Common Filtration Problems
Even experienced cooks encounter filtration challenges. These solutions address the most common issues.
If oil filters too slowly, the filter material might be too fine or clogged. Try using a coarser filter for the first pass, then filter again through finer material. Alternatively, let the oil cool slightly, as cooler oil flows more slowly but might be too hot if filtering is extremely slow.
When filtered oil still appears cloudy, you might need a finer filter or multiple filtering passes. Some particles are too small for standard filters to catch. Additionally, cloudiness sometimes indicates water emulsion rather than particles. Letting the oil sit allows water to separate and settle.
Oil that quickly becomes dirty again after filtering suggests inadequate fryer cleaning between batches. Residue on fryer walls constantly recontaminates the oil. Clean your fryer thoroughly, including hard-to-reach areas, before refilling with filtered oil.
If filters keep breaking or tearing, you might be pouring too forcefully or using too much pressure. Gentle, patient filtration prevents filter damage. Alternatively, you might need higher-quality filter materials that withstand the oil temperature and volume.
Environmental and Economic Benefits
Proper oil filtration creates benefits beyond immediate cost savings. Understanding these advantages might motivate better practices.
Filtering and reusing oil dramatically reduces waste. Restaurants that implement good filtration programs reduce their oil purchases by 30-50 percent. This means less oil production demand and fewer disposal problems.
Extended oil life lowers operating costs significantly. Oil represents a major expense for frying operations. When you double or triple oil life through proper filtering, you directly impact your bottom line. These savings can fund equipment upgrades or better ingredients.
Less frequent oil disposal reduces environmental impact. Used cooking oil must be processed for disposal or conversion to biodiesel. Reducing the volume of waste oil decreases the environmental footprint of your operation.
Better oil management improves food quality. Consistently clean oil produces better-tasting food with more appealing appearance. This translates to happier customers and potentially higher sales.
Conclusion
Filtering your deep fryer oil properly extends its usable life while maintaining food quality and safety. Whether you use simple manual methods or invest in sophisticated automatic systems, regular filtration removes the particles and contaminants that accelerate oil breakdown.
The key to success lies in establishing a consistent routine. Filter your oil regularly based on usage, not just when it looks terrible. Combine filtration with good daily maintenance practices like skimming and temperature control. These habits work together to maximize oil life.
Remember that even the best filtration can’t save oil forever. Know when to filter and when to replace. Fresh oil at the right time produces better food than over-filtered degraded oil. Balance economy with quality for the best results.
By implementing the techniques covered in this guide, you’ll reduce oil costs, improve food quality, and minimize waste. Whether you’re running a busy restaurant or just making French fries at home, proper oil filtration makes a meaningful difference in your results and your budget.
Frequently Asked Questions
How many times can I filter and reuse the same cooking oil?
The number of reuse cycles depends on several factors, including oil type, frying temperature, and what you’re cooking. Generally, you can filter and reuse oil six to eight times for most foods. However, fish and heavily breaded items degrade oil faster, limiting reuse to three to five times. Monitor oil quality rather than counting cycles, as conditions vary widely.
What’s the difference between filtering and clarifying oil?
Filtering removes solid particles and debris from oil using mechanical barriers like paper or cloth. Clarifying is a more intensive process that removes finer particles and some chemical contaminants, often using specialized filter powders or compounds. Filtering maintains day-to-day oil quality, while clarifying can restore moderately degraded oil to near-fresh condition.
Can I filter oil while it’s still hot?
You should let oil cool to 150-170 degrees Fahrenheit before filtering. This temperature allows good flow while preventing burns and protecting filter materials. Extremely hot oil can melt certain filters and poses serious safety risks. However, oil that’s too cool becomes viscous and filters very slowly, so finding the right temperature matters.
Do I need to filter oil after every use?
For home use, filtering after every two to three uses typically suffices. Commercial kitchens with high volume should filter daily or even between shifts. The key is observing your oil quality. If you notice particles, foaming, or darkening, filter regardless of how recently you last filtered. Prevention works better than waiting for obvious problems.
What should I do with oil that’s too degraded to filter?
Severely degraded oil requires replacement, not filtration. Let it cool completely, then pour it into a sealed container. Never pour it down drains. Check with your local waste management for disposal options. Many areas have recycling programs that convert used cooking oil into biodiesel fuel. Some services will even pick up large quantities from commercial kitchens.
Related Topics:
How to Choose the Best Home Coffee Machine in 2026
How Many Loads Does a Washing Machine Last?